Shiplap is becoming a very popular design element to many homes or buildings. You often see shiplap on every wall from top to bottom, ceilings, the bottom half of the wall, or on one feature wall. This wall feature can instantly turn a blank wall into a stylish focal point to your home, room or ceiling!
Shiplap is a very simple DIY project that any DIYer can do themselves! Depending on how much shiplap you are installing this could be done in only one day! If you plan on installing shiplap in a new build it is important to note that any areas that you want to include shiplap should be installed first, or at least taken into account when measuring so the doorjambs and other trim pieces can be made wider to achieve the best finish. In this blog, we will explain step by step on how to install shiplap on a wall.
Gathering Your Supplies Before Installation
Before you begin installing shiplap you will want to gather all of your tools. You will want to consider if you will be covering light switches, lights, or receptacles as you may need additional tools. Another thing you will need to think about is how you will be laying out your shiplap. Will it cover the entire wall, or half of the wall? Will it be installed on only one wall creating an accent wall?
You need to decide if you are taking baseboards off or if shiplap will be meeting up with any doorways. Special trim may be needed (build outs for door jambs and casing or back band may need to be added).
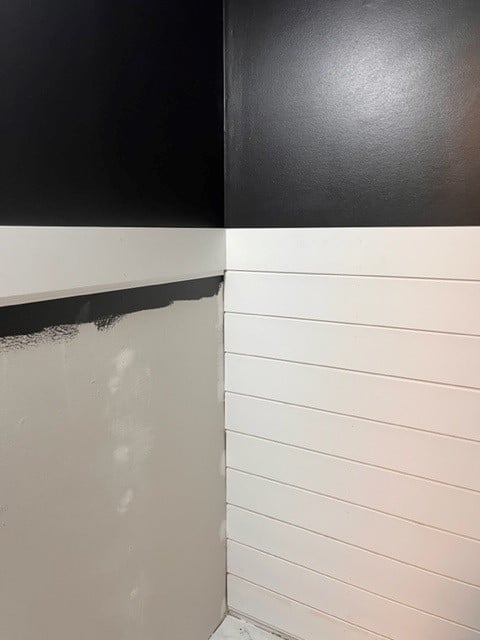
Before you start your project you should be confident about your decision on how it will look when it is completed. If you are installing the shiplap on only the bottom half of the wall, we recommend painting the top half of the wall prior to installing shiplap, like the image below.
Tool List:
– Miter saw
– Table saw
– Coping saw
– Multitool and or jig saw
– PL2000construction adhesive
– Hole saw
– Drill and drill bits
– Measuring Tape
– Utility Knife
– Pry Bar
– Stud Finder
– Level
– Nail Gun
– Shiplap
– Pencil
– Finishing Nails
– Chalk Reel Kit
– Paint Brush
– Drop Cloth
– Paint
– Paint Cover & Handle
If you are installing shiplap on a large area, it is best to have someone there to help hold the long pieces of shiplap. So lets add “Team member” to that tools list!
Prepping Your Station
Now that you have all of your tools, it’s time to get your wall ready to install that shiplap! Remove any outlet covers, wall décor pieces, and any mouldings like baseboard or casing. If you plan to use the old trim pieces make sure you are careful when prying them off with your pry bar.
Step 1: Measuring
The first step is measuring the space that you will be installing the shiplap. If the wall is completely flat, with no windows the measure should be simple! If there are windows or doors on the wall don’t forget to subtract that from the total. Divide the height of the wall by the width of the board you plan to use.
At Riverside Millwork Group we offer shiplap in two main sizes, 5 ¼” and 7 ¼”. For example, if the height of your wall is 108” tall you will divide that by whatever shiplap size you choose. A useful rule of thumb is to add 10% to the amount you need for possible waste, errors, or any custom cuts.
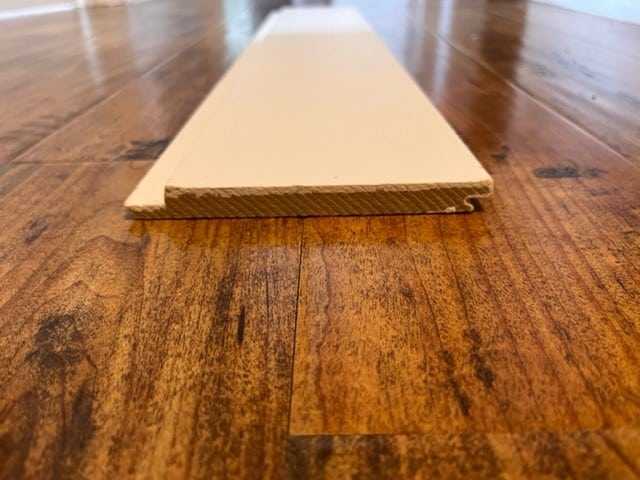
As for making a decision on what size of shiplap you want, typically our trained Sales Representatives suggest a large area, with taller ceilings would look best with the larger shiplap pieces at 7 ¼”,for smaller rooms the 5 ¼” would suffice. Although, the sizing completely depends on your personal preference and there is no right or wrong answer. Below is an image of what the shiplap looks like before it is installed.
Step 2: Finding your Studs
Now you will use your stud finder and mark the location of each stud you find. You can use the chalk reel kit for this, or a pencil if it is a smaller area.
Step 3: Installing Shiplap
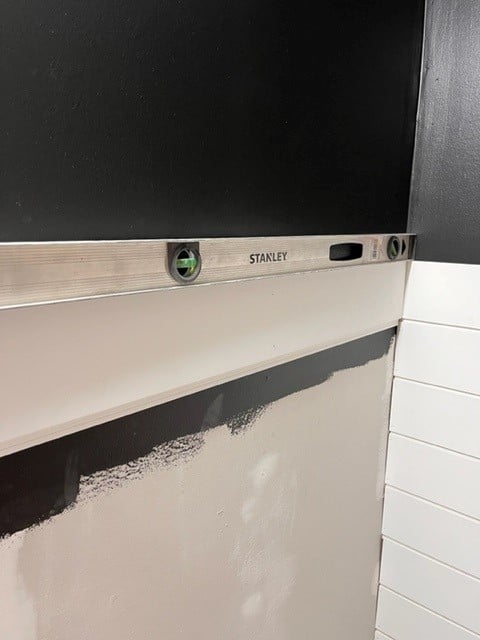
By starting at the top you will hold the first piece of shiplap horizontally and use your standard level to make sure your shiplap piece is straight. In older houses you may find the ceiling or wall off balance so it could be slightly tricky to get the shiplap perfectly level, it is best that you have a partner to help with this step.
You have to make sure the lip of the shiplap is facing down to the floor. See the image below, the long edge should be sticking out at the bottom, this allows another piece to attach to the piece above it.
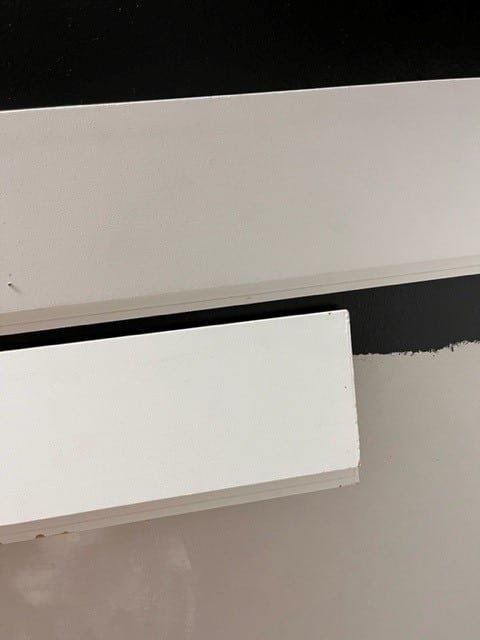
Using your nail gun and having your partner hold one end of the shiplap while you hold the other you can now start the installation process! Making sure you follow the guidelines you created as to where the studs are you can start nailing through the top and bottom of the board where the studs are. Continue the process until you finish nailing the entire shiplap piece. The next piece of shiplap should connect easily to the top piece, the shiplap pieces should look like the image above.
Make sure you stagger the shiplap if you are installing the shiplap on an area that is larger than the longest piece you have. This means the end of the shiplap should end at different spots on every level. Continue this process until the wall is complete. Cut outs around receptacles and switches should be tight so that you can pull it out and mount it against the shiplap. Sometimes longer screws may be needed.
Step 4: Trim
Finally, you can now add your baseboard at the bottom of the wall to cover any gaps. This can be installed with your nail gun.
Step 4: Painting
Of course, we can’t forget about the finishing touches. You often see shiplap painted white, although we have seen shiplap in a variety of colours. You will need to gather your paint supplies such as a paint brush, a roller cover and handle and any rags for possible spilling or dripping.
In the image below you can see the shiplap on the wall is painted a natural green tone. This colour accents the wood casing and window casing in this stunning upgraded Beach Motel in Southampton Ontario. Although if your eyes stray to the ceiling you can see they left the shiplap a bright white, which adds contrast to the wall colour.

Once you measure the wall and decide on what size of shiplap you want, give one of our three showrooms a call to place your order, or send us an email at inquiries@riversidemillwork.ca
London Showroom
519-686-7573
Waterloo Showroom
519-578-3265
Stoney Creek Showroom
289-649-0505